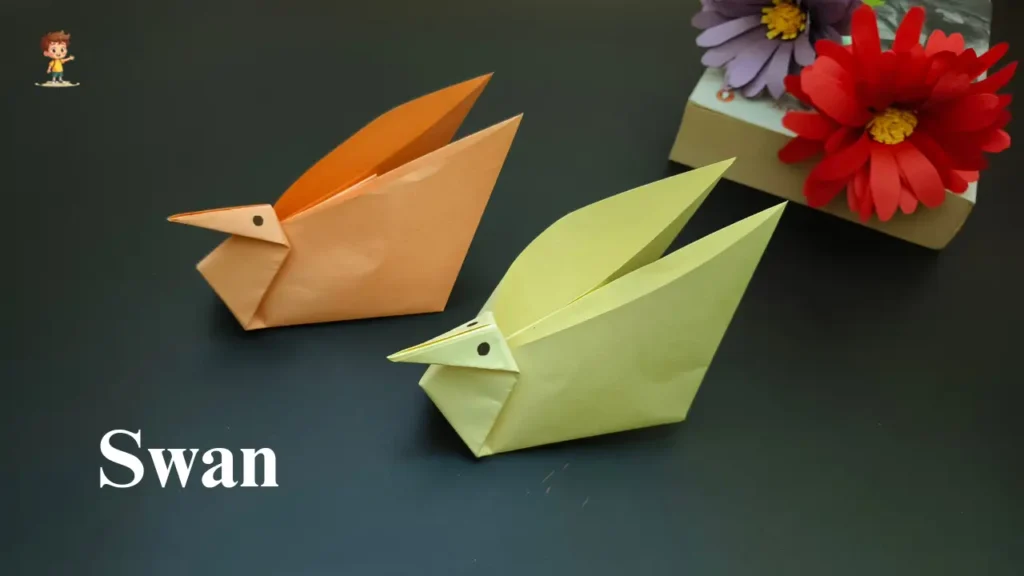
Welcome to this Easy Swan Origami Tutorial for Beginners — a perfect guide for anyone who loves simple and creative paper crafts. Origami is a relaxing and enjoyable art that transforms a plain sheet into something beautiful. In this post, you’ll learn how to make a paper swan step by step using easy folds and clear instructions. This simple origami swan tutorial is beginner-friendly and requires no special tools. Whether you’re crafting for fun, school projects, or relaxation, this DIY paper swan craft will bring joy, focus, and creativity to your day.
What Is Origami and Why You’ll Love It
Origami is the traditional Japanese art of folding paper into decorative shapes and figures. It doesn’t require expensive materials or tools — all you need is a single piece of paper and your hands. The best part about origami is that it helps you slow down and focus. Folding paper into beautiful shapes brings a sense of calm and satisfaction.
When you try easy paper swan origami, you’ll notice how a simple square sheet can transform into an elegant swan with just a few folds. It’s fascinating to see how small changes in folds create a new structure every time. And since swans symbolize grace, beauty, and purity, they make a perfect first project for anyone starting their origami journey.
Materials You Need for Swan Origami
Before you begin, gather these simple materials:
- One A4 size paper (any color you like)
- A pair of scissors (only if you need to cut the paper into a square)
- A black marker or pen (to draw the eyes)
- A flat surface for folding
That’s it! You don’t need glue, tape, or any special craft tools. This is what makes DIY paper swan craft projects so enjoyable — they’re budget-friendly and accessible to everyone.
Easy Swan Origami Tutorial for Beginners
Now it’s time to start folding your paper swan. Follow this step-by-step guide carefully. Each fold builds on the last one, so make sure to press each crease firmly. If you make a small mistake, don’t worry — origami is all about practice and patience.
Step 1: Prepare Your Paper
Take an A4 size paper and turn it into a square sheet. To do this, fold one corner diagonally to the opposite edge and cut off the extra strip at the bottom. You’ll now have a perfect square — the base for your swan origami for beginners.
Step 2: Fold Diagonally
Fold the square paper diagonally in half to form a triangle. Make sure the edges meet neatly. This will be the foundation of your easy paper swan origami.
Step 3: Identify the Base
Place the triangle with the longer side at the bottom. This side will act as your base. It helps in creating the perfect body shape of the swan.
Step 4: Fold Upward
Now, take one corner of the base and fold it upward so it touches the opposite corner of the base. Press it well to make a neat crease. This fold helps define the wings and the upper body.
Step 5: Unfold
Open the smaller triangle back up so the large triangle shape returns. This step prepares your paper for the next set of folds that will give structure to the swan’s body.
Step 6: Fold the Base Corners Down
Next, fold one corner of the base downward. Repeat the same step on the other side. This creates the first visible outline of your simple origami swan tutorial.
Step 7: Create the Neck and Beak
Now, fold the pointed top part of the paper as shown in the video. This will form the neck and head of your swan. Press the folds tightly for a clean finish.
Step 8: Fold in Half
After shaping the neck, fold the entire paper in half carefully along the middle line. You’ll see the swan’s outline becoming clear. The back of the fold will serve as the body, and the upper fold will form the wings.
Step 9: Shape the Beak
Gently fold a small portion of the pointed end downward to create the beak. Make sure it’s symmetrical and neat. This tiny detail gives your swan its realistic look.
Step 10: Spread the Wings
Finally, insert your fingers gently under each wing and spread them out. Adjust them slightly until the swan looks balanced and graceful.
Step 11: Add the Final Touch
Use your black marker to draw two small eyes on the head. And just like that, your easy paper swan origami is complete!
Congratulations! You’ve just completed your DIY paper swan craft using nothing more than your hands and imagination.
Why This Swan Origami Is Perfect for Beginners
This swan origami for beginners project is ideal because it teaches you basic origami folds without overwhelming you. Each step builds a foundation for more complex designs you might try later. The folds are simple yet meaningful, showing how precision and patience create beauty.
Also, this activity improves hand coordination, focus, and fine motor skills — perfect for both kids and adults. You can even turn it into a family craft activity or a classroom art project.
Creative Ways to Use Your Paper Swan
Once your swan is ready, you can use it in many creative ways!
- Home Decor: Display it on your shelf or desk as a decorative piece.
- Gift Idea: Attach it to a greeting card or gift box for a handmade touch.
- Classroom Project: Teachers can include this simple origami swan tutorial in art sessions to encourage creativity among students.
- Festive Decoration: Make multiple swans in different colors for party or festival décor.
- Mindfulness Practice: Folding origami helps reduce stress and anxiety, making it a great relaxation technique.
Pro Tips for a Perfect Origami Swan
To make your swan look neat and professional, keep these tips in mind:
- Use crisp paper: Thinner paper folds better and holds shape easily.
- Make sharp creases: Use your nail or a flat object to press folds firmly.
- Work on a flat surface: This helps maintain balance while folding.
- Be patient: If one fold doesn’t look right, unfold and try again.
- Experiment with colors: White paper looks classic, but pastel shades make your swan look artistic.
These simple tricks will make your easy paper swan origami look elegant and refined.
Benefits of Doing Origami
Origami is more than just an art form; it’s a form of mental therapy. Here are some of the amazing benefits of practicing origami regularly:
- Boosts concentration: You focus deeply on each fold, which sharpens your attention.
- Enhances creativity: Every project allows you to think visually and creatively.
- Relieves stress: The repetitive motion of folding paper has a calming effect.
- Improves problem-solving: You learn to visualize and plan steps in sequence.
- Builds patience: Perfecting each fold teaches persistence and mindfulness.
So, while making this DIY paper swan craft, you’re also taking a step toward relaxation and creativity.
Easy Swan Origami Tutorial for Beginners: Practice Makes Perfect
Every time you fold a paper swan, you’ll get better at aligning the edges, making crisp creases, and balancing the wings. The first few times might not look perfect — and that’s completely fine! Each attempt improves your technique.
To take your origami journey further, try making two or three swans in different sizes and colors. Arrange them together to create a mini “swan family” display. This simple idea adds beauty to any space and motivates you to keep exploring origami.
Troubleshooting Common Mistakes
Here are a few common issues beginners face while making swan origami for beginners and how to fix them:
- Uneven shape: Ensure your paper square is perfectly cut before folding.
- Wings not balanced: Refold the wings slightly to align both sides.
- Paper tearing: Use thinner paper and fold gently, not forcefully.
- Loose folds: Press creases firmly with your fingernail or a ruler edge.
With these fixes, your simple origami swan tutorial will become easier and more satisfying.
Add Your Personal Touch
Once you’ve made your basic swan, you can personalize it in many ways. Add colors, patterns, or stickers to make it more vibrant. You can even write your name or a short message on it if you’re gifting it to someone.
This is what makes DIY paper swan craft so special — it’s uniquely yours! Every piece reflects your mood, effort, and creativity.
Conclusion
Learning how to make a paper swan step by step is a joyful experience. This Easy Swan Origami Tutorial for Beginners proves that beautiful crafts don’t need to be complicated. With just one piece of paper, a few careful folds, and a little patience, you can create something graceful and timeless.
Whether you’re crafting for fun, relaxation, or decoration, this swan origami for beginners will surely brighten your day. So grab your paper, start folding, and let your creativity soar like a swan across calm waters.
FAQ Related to:
How do I make a paper swan step by step?
You can make a paper swan step by step by following simple folds: start with a square sheet, fold it into a triangle, create the wings, shape the neck and beak, and finally spread the wings. It’s easy to follow and perfect for beginners.
What is the easiest way to fold a swan origami for beginners?
The easiest way is to use a single square paper, fold diagonally to form a triangle, then carefully fold the base corners and top point to create the body and neck. This method keeps it simple and beginner-friendly.
Can kids follow a simple origami swan tutorial?
Yes! Kids can easily follow a simple origami swan tutorial. Use colorful paper, guide them through each fold slowly, and encourage them to practice. It’s a fun craft that also improves focus and fine motor skills.
What materials do I need for a DIY paper swan craft?
All you need is a square sheet of paper, a flat surface to fold on, and optionally a black marker to draw the eyes. No scissors, glue, or fancy tools are required, making it a simple and budget-friendly craft.
How do I make my paper swan look professional and neat?
To make your swan look professional, use crisp paper, make sharp creases, fold carefully, and adjust the wings evenly. Small details like shaping the beak and drawing eyes neatly will enhance its elegance.